
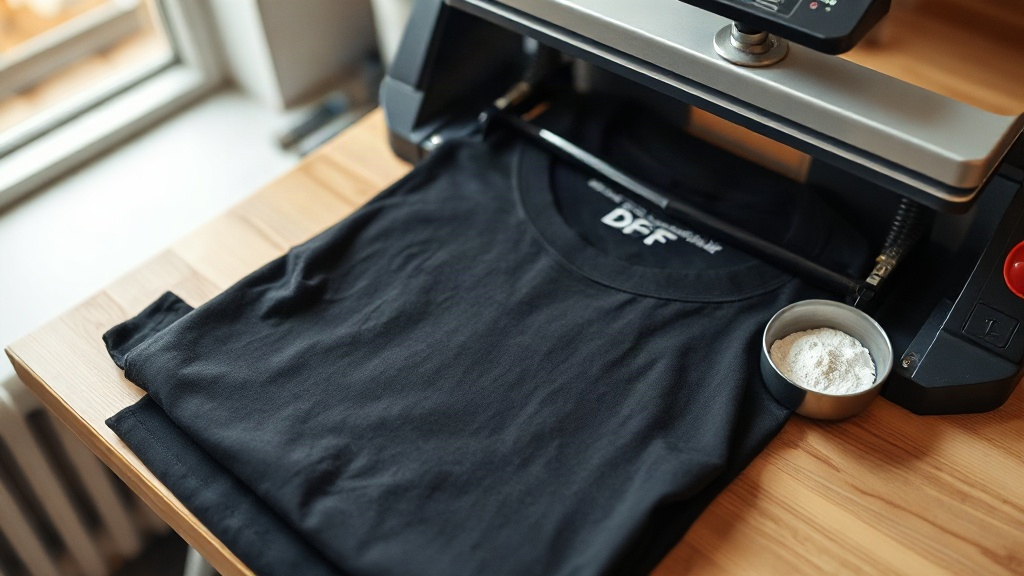
If you have ever peeled a heat transfer vinyl design only to watch half the letters come up with the carrier sheet, you already understand why so many crafters switch to DTF transfers. Direct-to-film printing skips the weeding entirely. Your design is printed onto a special film, dusted with adhesive powder, cured, and then pressed onto fabric with a heat press. The result is a soft, stretchy, full-color print that survives dozens of washes on cotton, polyester, blends, and even nylon.
This guide walks through what actually happens inside the process, which supplies are worth your money, and the small habits that separate crisp prints from cracked, faded ones. Whether you run a small apparel business or just want to customize team jerseys without ordering a hundred-piece minimum, the practical details below will save you both time and wasted film.
What Exactly Are DTF Transfers?
A DTF transfer is a printed image on a PET film that carries a thermoplastic adhesive layer. When heat and pressure are applied, that adhesive bonds the ink to the fabric fibers. Unlike sublimation, which only works on light polyester, DTF adheres to cotton, blends, and dark garments with equal success. Unlike screen printing, it does not require a separate screen for every color, which makes short runs and photographic designs far more affordable.
The print itself is built from white ink and CMYK inks. The white layer acts as an opaque base so colors stay bright on dark shirts, and the CMYK layer sits on top to produce the final image. Because the white ink is printed first, the design must be mirrored before printing; otherwise the image transfers backwards. Most RIP software handles this automatically, but it is the single most common mistake among newcomers.
The Role of the Adhesive Powder
After printing, the wet ink is covered with a fine thermoplastic powder. You shake off the excess, then cure the film in an oven or with a heat press. The powder melts into the ink and becomes the glue that holds everything to the fabric. Skip this step and your transfer will peel off in the first wash, no matter how good your press settings are.
Supplies You Actually Need
Starting with DTF does not require a full industrial setup. A reliable desktop DTF printer, quality film, adhesive powder, and a heat press cover the essentials. Here is what to prioritize:
- Printer: A dedicated DTF printer with white ink circulation. Converted inkjet printers can work, but they clog more often when white ink sits idle.
- Film: Double-sided matte PET film in 13-inch or 24-inch rolls. Cheaper film tends to warp under heat and leave a plastic feel.
- Powder: Fine-grain TPU adhesive powder. Coarse powder creates a grainy texture that shows through light-colored shirts.
- Heat press: A clamshell or swing-away press with accurate temperature control. A household iron will not hold the consistent 320°F most films need.
- Protective sheet: A Teflon or parchment cover sheet to keep melted powder off your press platen.
Budget-conscious starters often buy pre-printed DTF transfer sheets from a supplier before investing in a printer. That is a smart way to test demand for custom apparel without committing thousands of dollars to equipment.
Step-by-Step: Pressing a DTF Transfer
1. Prepare the Garment
Pre-press the shirt for five to ten seconds. This removes moisture and wrinkles, both of which cause uneven adhesion. Cotton holds a surprising amount of ambient humidity, and trapped moisture turns to steam under the press, pushing the ink away from the fibers.
2. Position and Press
Place the transfer with the printed side facing the fabric. Set your press to roughly 300 to 325°F with medium to firm pressure. Press for 10 to 15 seconds. Thicker fabrics like hoodies may need a few extra seconds, while thin performance wear can tolerate less.
3. Peel Correctly
Most modern films are cold peel, meaning you wait until the transfer cools completely before removing the carrier. Peeling warm pulls ink with it and leaves a dull, patchy finish. If your film is hot peel, follow the supplier's instructions instead, since peeling late can cause the adhesive to set onto the carrier.
4. Post-Press for Durability
Cover the design with your protective sheet and press again for five to ten seconds. This second press smooths the surface and locks the adhesive into the weave. It is the step most people skip, and it is the one that makes the biggest difference in wash life.
Choosing Fabric and Getting the Feel Right
DTF works on nearly everything, but the hand feel varies. On 100% cotton, the print sits slightly on top of the fabric and feels smooth. On polyester, the ink bonds more deeply and the print feels thinner. On stretchy blends, a well-cured DTF transfer stretches with the garment instead of cracking, which is why it has become popular for athletic wear and leggings.
If softness matters most, keep your ink layers thin. A design with heavy white coverage will always feel stiffer than one with open areas. Reducing the white ink density in your RIP settings, or choosing designs with negative space, gives a noticeably softer result without sacrificing color.
Common Mistakes and How to Avoid Them
- Forgetting to mirror the image. Check your print preview before every run.
- Under-curing the powder. If the powder still looks sandy after curing, it needs more time or heat.
- Peeling too early. Let the transfer reach room temperature unless the film is labeled hot peel.
- Using too much pressure. Excessive pressure flattens the ink and causes the design to spread at the edges.
- Washing too soon. Wait at least 24 hours before the first wash so the adhesive fully sets.
Keeping a small notebook with your press settings for each fabric type pays off quickly. Once you find the sweet spot for a popular shirt style, you can repeat it without guesswork.
Frequently Asked Questions
How long do DTF transfers last on a shirt?
With proper curing and washing inside out in cold water, a quality DTF transfer typically lasts 50 washes or more. Air drying instead of tumble drying extends that life considerably.
Can I use DTF transfers on dark and light fabrics?
Yes. The white ink base makes colors pop on black, navy, and other dark garments, while the same transfer works just as well on white or pastel fabric. No separate film type is needed.
Do I need a special printer for DTF transfers?
A dedicated DTF printer is recommended because white ink requires constant circulation to prevent clogging. However, you can buy ready-to-press DTF transfer sheets from a supplier and apply them with only a heat press.
Why is my DTF transfer cracking after washing?
Cracking usually points to under-curing, insufficient pressure, or stretching the garment while the print is still warm. Re-check your press time and temperature, and always post-press the design before the first wear.
Is DTF better than heat transfer vinyl?
For full-color or photographic designs, DTF is faster because there is no weeding. For simple single-color text or shapes, vinyl can still be cheaper per unit. Many shops keep both on hand and choose based on the job.