Common mistakes in custom patch design can undermine your branding goals from the very first draft; custom patch design mistakes that recur across projects can create a ripple effect that reaches proofreading, proofs, and production timelines, and leaving your client with a patch that looks great on screen but falls apart in wear, jeopardizing trust and raising questions about long-term brand consistency across merchandise and uniforms. Understanding how scale, legibility, and color translation interact with actual fabric and thread choices is essential, because when designers overestimate legibility or misjudge a patch’s minimum size, the result is a product that communicates the brand message inconsistently, triggers costly iterations for embroidery patch production, and compounds risk for downstream labeling, packaging, and verification. Another common patch design mistake involves poor artwork preparation and vectorization, since raster images, blurry edges, or unclean outlines often fail to translate into robust stitch paths, producing what many printers call common patch design errors that force re-digitizing and longer lead times, complicating supplier approvals and delaying market introduction. To prevent these issues, you should follow patch design tips such as selecting the appropriate backing and patch type, planning safe areas and borders, and validating color with a production-approved proof to bridge the gap between digital visuals and embroidery reality, while also accounting for fabric stretch and dye migration that can shift appearance in wear. Finally, committing to rigorous patch quality control throughout digitizing, sampling, and final QC checks helps ensure color accuracy, stitch density consistency, and overall durability, turning a well-conceived concept into a reliable product that performs as expected in the field and remains visually consistent across batches.
To broaden the discussion, think of these ideas using related terms that capture the same risk landscape: patch creation pitfalls, badge embroidery missteps, and patch manufacturing challenges. This LSI-informed framing emphasizes design risk, production constraints, and color fidelity gaps rather than labeling everything as errors. By mapping these concepts to suppliers, workflows, and quality gates, teams can plan more resilient patches. In practice, this means early prototyping with real materials, transparent digitizing, and clear acceptance criteria that align all stakeholders.
Common mistakes in custom patch design: how to spot and avoid them
Understanding the landscape of patch design helps you spot the frequent missteps that derail projects. Common mistakes in custom patch design often stem from misaligned expectations between artwork, production capabilities, and the final wearable product. By recognizing these pitfalls early—such as underestimating size, ignoring color translation, or skipping thorough proofing—you can set up a workflow that minimizes rework and delays. This awareness also frames a collaborative approach where designers, clients, and manufacturers share a precise brief from the start.
To prevent these issues, adopt practices that address the spectrum of patch design mistakes and common patch design errors. Emphasize clear briefs, timely proofs, and open communication with the embroidery patch production team. By treating patch design as a joint effort and documenting decisions—especially around size, color targets, and backing choices—you reduce the risk of costly redesigns and keep production on schedule.
Patch design tips for legibility, color accuracy, and durable finishes
A core patch design tip is to ensure legibility and readability, particularly for text and small details. Start with a practical minimum size, choose bold, clean typefaces, and test legibility at the intended production scale. These patch design tips help ensure your message remains clear on fabric, even from a distance, and reduce the likelihood of postage-stamp-sized text that fails in embroidery.
Color accuracy is another critical area. Manage expectations by using a standardized color system (like Pantone) that translates to embroidery threads, and request a color separation sheet early in the process. Build in margins for color shifts, opt for high-contrast combinations on dark backgrounds, and demand a color-approved proof showing actual thread colors. These steps align your visuals with embroidery patch production realities and minimize post-production rework.
Color management in embroidery patch production: translating screen colors to thread
Color management can make or break a patch’s branding impact. Screens render colors differently than thread palettes, so relying on screen hues alone is a common pitfall in embroidery patch production. To bridge the gap, commit to a formal color system, reference swatches against actual thread books, and validate via an early color-proof before production begins.
In practice, this means requesting a color-separation sheet, accounting for thread limitations, and factoring in fabric background effects. By predicting how color shifts may occur and approving proofs that reflect real thread tones, you protect color fidelity across materials and finishes. This proactive approach supports patch quality control and helps ensure the final patch matches the brand’s color identity.
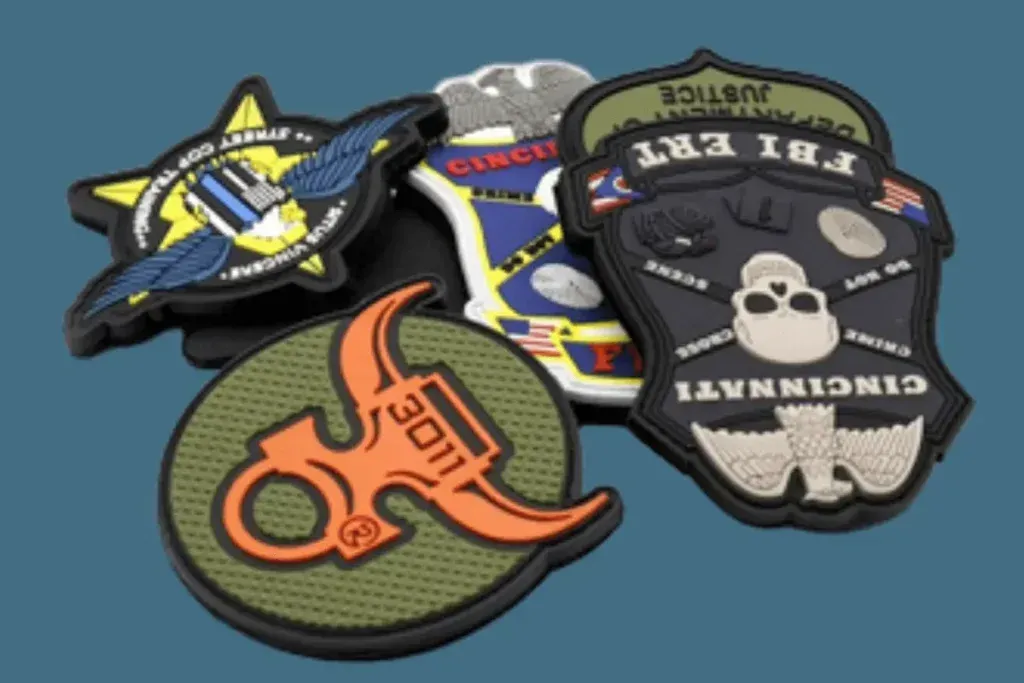
Choosing the right patch type and backing for your design
The patch type and backing you choose should align with design intent and end-use. Embroidery, weave, PVC, and iron-on patches each bring different strengths and limitations, so selecting the right combination up front is a major patch design tip. For example, tiny details may benefit from embroidery with higher stitch density, while bold logos might thrive with PVC for durability and a cleaner silhouette.
Backing materials also affect wear, washability, and adhesion. Consider the application environment, whether the patch will be sewn or ironed on, and how often it will be laundered. Getting these choices right at the outset prevents a cascade of changes later in production and reduces the risk of patch design errors after artwork is finalized.
Edge finishing, safe areas, and tolerances to protect branding
Edge finishing defines the patch’s silhouette and long-term durability. Classic Merrow borders, laser-cut edges, and heat-sealed finishes each have distinct implications for wear and shape stability. A common misstep is selecting an edge finish that doesn’t suit the material or size, which can lead to fraying or distortion during wear.
Safe area, bleed, and production tolerances are technical but essential. Define a safe zone and keep critical elements inside it, confirm trim allowances with the manufacturer, and account for shrinkage during embroidery or weaving. Establishing realistic tolerances and testing edge finishes in real materials helps prevent branding elements from being trimmed away or misaligned in the final product.
Proofing, testing, and quality control: building a robust pre-production workflow
A rigorous proofing and testing process is the most effective defense against post-production surprises. Skipping pre-production proofs or rushing samples is a common patch design mistake that leads to costly rework. Build a workflow that includes early proofs, color separations validation, stitch-density testing, and scale verification before approving a run.
Quality control should be woven into every step, from digitizing to final inspection. Request pre-production samples, establish acceptance criteria, and align with the embroidery patch production team on wash tests, wear scenarios, and tolerance checks. A disciplined pre-production workflow reduces the risk of patch quality control failures and delivers consistent, brand-faithful patches at scale.
Frequently Asked Questions
What is the impact of size and legibility on common mistakes in custom patch design, and what patch design tips can prevent them?
Size and legibility are a frequent pitfall in common mistakes in custom patch design. A design that looks great on screen can become unreadable in production if text is too small or details are too delicate. To prevent this, set a practical minimum size, test legibility at the actual production scale, use bold typefaces, and request proofs before full production, applying proven patch design tips and quality-control checks.
How does poor color management contribute to common patch design errors during embroidery patch production, and what steps reduce risk?
Color management is a common cause of patch design errors in embroidery patch production due to mismatches between screen colors and thread colors. Use Pantone or a standardized color system, obtain an early color separation sheet, and build in margins for shifts. Require a color-accurate proof showing actual thread colors to improve patch quality control and reduce post-production rework.
Why is proper artwork preparation and vectorization critical to avoid common mistakes in patch design?
Artwork that isn’t properly prepared can lose fidelity when translated to embroidery or weaving. Submit vector files (AI, EPS, SVG) with clean outlines and no embedded raster textures, ensuring line work translates to stitches or weave. If needed, use digitizing services to convert artwork into stitch-ready formats, helping prevent common patch design errors and speeding embroidery patch production.
How can choosing the wrong patch type and backing create common patch design errors, and how should you select accordingly?
Selecting a patch type and backing that don’t align with the design intent leads to common patch design errors. Evaluate whether the project benefits from embroidered, woven, PVC, or other patch types and choose backing (iron-on, self-adhesive, or fabric) based on wear, washability, and application. Align these choices with durability needs and production realities to avoid costly redesigns and ensure patch quality control.
What role do edge finishing and safe area/border choices play in preventing common patch design errors?
Edge finishing defines silhouette and durability, and incorrect border choices can distort the design. Decide on border style (Merrow, laser-cut, heat-sealed) early and test it on the chosen fabric. Consider minimum curvature and stitching tension for tight curves to prevent distortion, enhancing aesthetics and long-term patch integrity as part of patch quality control.
Why is rigorous proofing, testing, and timing essential to avoid common mistakes in custom patch design?
Insufficient proofing is a frequent trigger of delays and rework in common mistakes in custom patch design. Implement a rigorous pre-production proof, review color separations and stitch density, verify scale, and allow buffer time for revisions. Produce a pre-production sample to validate tolerances and wear conditions, supporting timely delivery and strong patch quality control.
| Mistake | Description | Impact / Why It Matters | How to Avoid (Tips) |
|---|---|---|---|
| Mistake 1: Underestimating size and legibility | Choosing a patch size that looks good on screen but becomes unreadable on fabric due to tiny text, delicate details, or hairline outlines. | Legibility is essential for branding and message clarity; illegible patches can fail in real-world use. | Set a practical minimum size, test legibility at production scale, use bold, clean typefaces, and request proofs at the intended size. |
| Mistake 2: Poor color management and limited palette | Relying on screen colors that don’t translate to thread colors; not using standardized color references. | Color mismatch reduces perceived quality and increases rework after production. | Work with Pantone or a standardized color system, request color separation sheets early, build in color shift margins, and insist on color-approved proofs showing actual thread colors. |
| Mistake 3: Inadequate artwork preparation and vectorization | Submitting raster artwork that loses edge sharpness when scaled or digitized for embroidery or weaving; artwork not prepared as clean vectors. | Fidelity loss during stitching can blur logo details and reduce accuracy. | Provide vector files (AI/EPS/SVG) with clean outlines, ensure line work is unified, test details with stitch simulators, and use a digitizing service when needed. |
| Mistake 4: Choosing the wrong patch type and backing | Design intent not aligned with patch technology or backing (embroidery, woven, PVC, iron-on) and backing material choices. | Mismatched patch type can affect durability, appearance, and wear performance. | Discuss application environment early, select patch type and backing suited to durability and washability, and align with end-use. |
| Mistake 5: Inadequate edge finishing and border choice | Edge finish (Merrow, laser-cut, heat-sealed) may not suit material, size, or wear; finishing choices can cause fraying or distortion. | Poor edge finishing weakens silhouette and durability and may shorten patch life. | Specify border style early, test on chosen fabric, verify curvature and stitching tension with manufacturer. |
| Mistake 6: Missing safe area, bleed, and scaling considerations | Critical elements placed too close to edge may be trimmed away; unsafe margins and inadequate scaling cause misalignment. | Production trim and fabric movement can erase or distort important features. | Define a safe zone, confirm trim allowances, and account for shrinkage; test with production samples. |
| Mistake 7: Text and fine details that won’t translate well | Small text, micro details, or thin strokes may not reproduce well in thread; gradients may not translate. | Details can blur or vanish in production, harming brand clarity. | Simplify details, bold small text, avoid gradients, and test with a production sample. |
| Mistake 8: Underestimating production tolerances and real-world wear | Assuming perfect replication; not accounting for size, color, and shape variances in embroidery/weaving. | Variations can lead to customer disappointment and rework. | Set realistic tolerances with the manufacturer, request pre-production samples, and discuss wash tests and wear scenarios. |
| Mistake 9: Inadequate proofing, testing, and timing | Skipping thorough pre-production proofs or rushing samples to meet deadlines. | Rushed or incomplete proofs increase the risk of costly redesigns and delays. | Implement a rigorous proofing process: early proofs, color separations, stitch density tests, scale validation, and physical samples; build in revision buffers. |
Summary
Conclusion: Common mistakes in custom patch design can derail a project, but a disciplined workflow—from artwork preparation to pre-production proofs and final patch quality control—helps prevent them. By addressing size and legibility, color management, vector artwork, patch type/backing, edge finishing, safe areas, and production tolerances, teams can shorten timelines, reduce costs, and deliver patches that look great and wear well. Emphasize collaboration with designers and manufacturers, implement clear briefs, proofs, testing, and QC criteria, and plan for wash tests and real-world wear. This structured approach aligns with patch production, embroidery patch production, and patch quality control best practices, delivering reliable results for brands and teams alike.